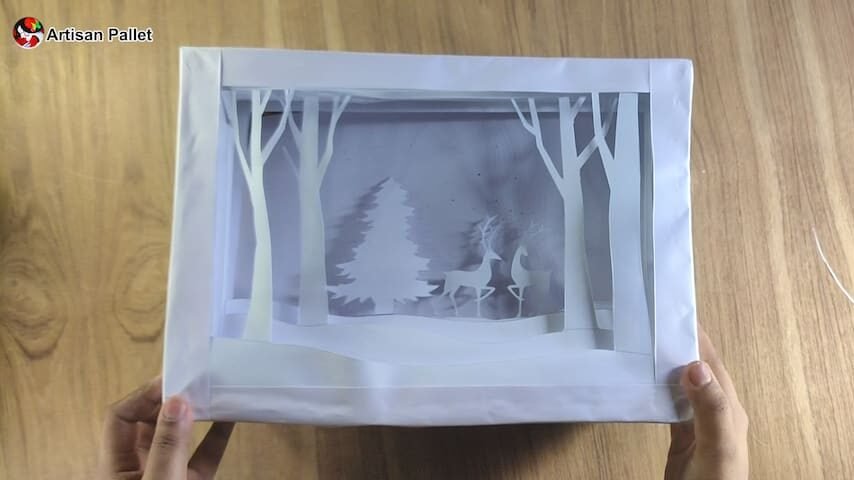
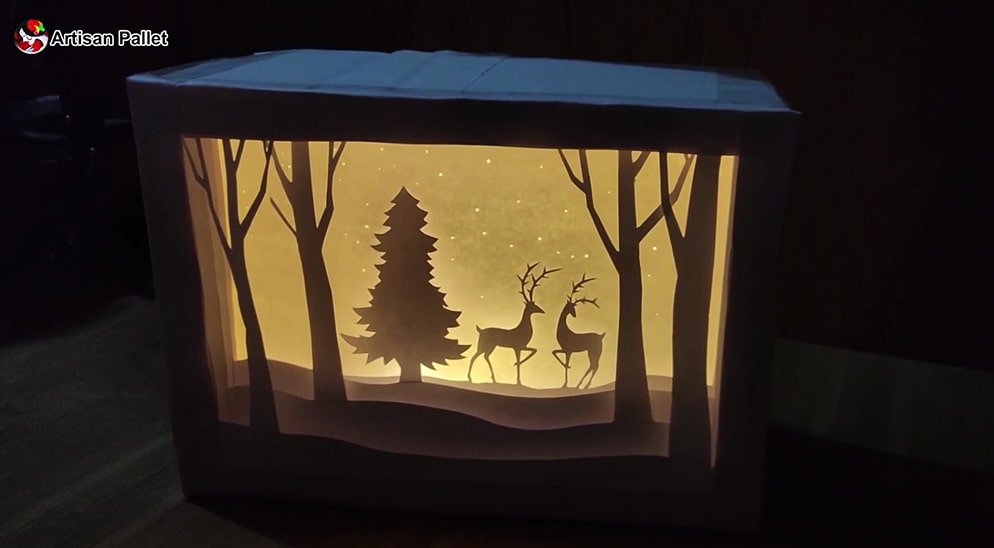
You can display a beautiful shadow box frame full of Reindeer in the wood as a part of your Christmas decor and add light to create an enchanting and colorful scene.
Whether you want to decorate your home or give a unique gift, this piece is perfect for both. Let it grace your desk and admire its beauty…
My materials were as follows:
- White card stock (thickness 170 grams )
- A4 paper (80 grams thickness)
- Foam/ Thermocol board
- LED lights
- White glue
- Pins
- Pencil
- Eraser
- X-Acto knife
- Ruler
- Scissors
Step 1: Use the Template given, or prepare your own design
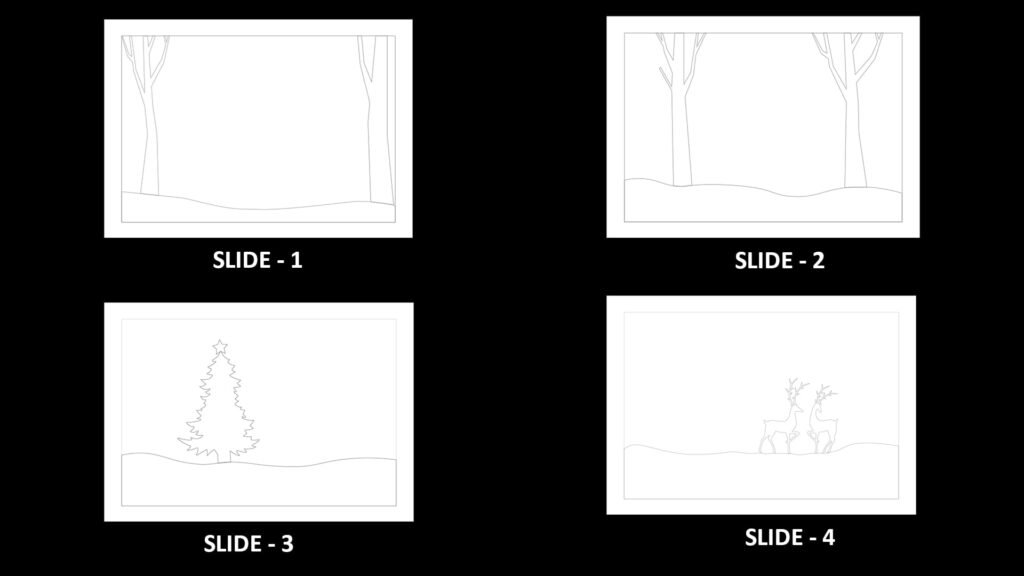
I created the design for this lightbox and made a template.
To begin, you must download the template and print it out. you can also scale it according to your lightbox. You can create your own design if you want it to be personalized.
Step 2: Use the XACTO knife to cut the layers
It is also possible to make your own design if you want it to be personalized.
To make a white card stock stand out, I recommend 170 grams because it’s stiff enough to hold up while thin enough to allow light to pass through.
Once you’re performed with the primary layer, minimize it by the use of an X-Acto knife. X-Acto knife is a unique cutting tool to deliver the sharpest, cut on your projects.
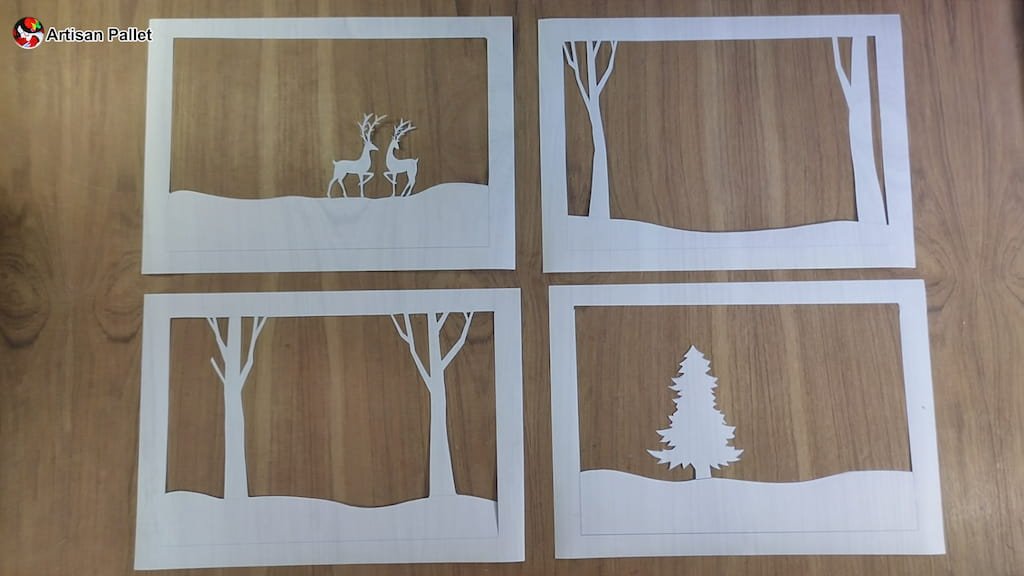
Similarly, I have cut all the layers and added a border on each and every layer, around 2 cm. This will assist you to glue the layers with the thermocol fame.
Step 3: Make the Thermocol Frame for the Shadowbox

Foam spacers were cut out. Depending on the size of your lightbox, there should be four spacers on each layer.
My next step was to glue the thermocol layers together. It was important that they were correctly oriented. Repetition is necessary to attach all layers.
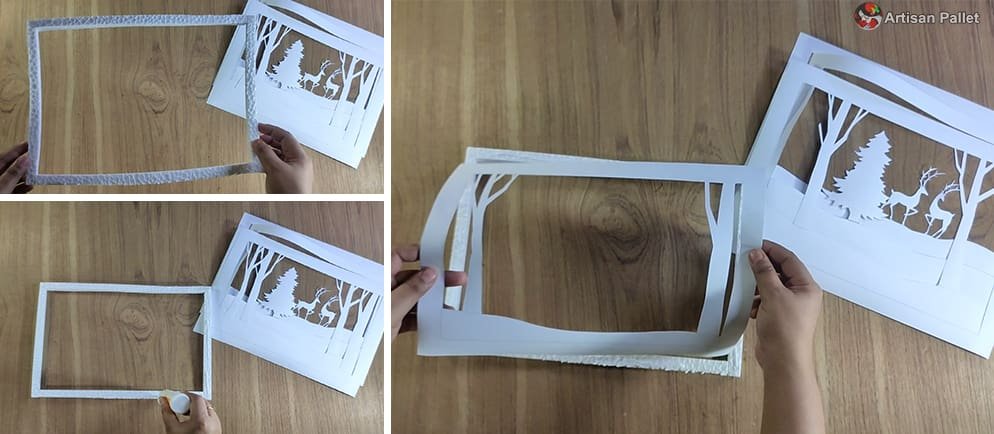
Once the layers were glued together, I finished the design. After gluing the first layer down, I’ll add a spacer around the edges, then glue the next layer down. Align the layers properly before gluing the next one down. The process should be repeated until the layers are all glued together.
If you add more layers to your Christmas shadowbox, you get a better result.
Step 4: Make a outer frame with card board

Here I have made an outer frame or a box with cardboard and covered it with white art paper. As well as buying or building a wooden box, you can buy boxes online. But I like working with cardboard and paper because it’s pocket-friendly and easy to find.
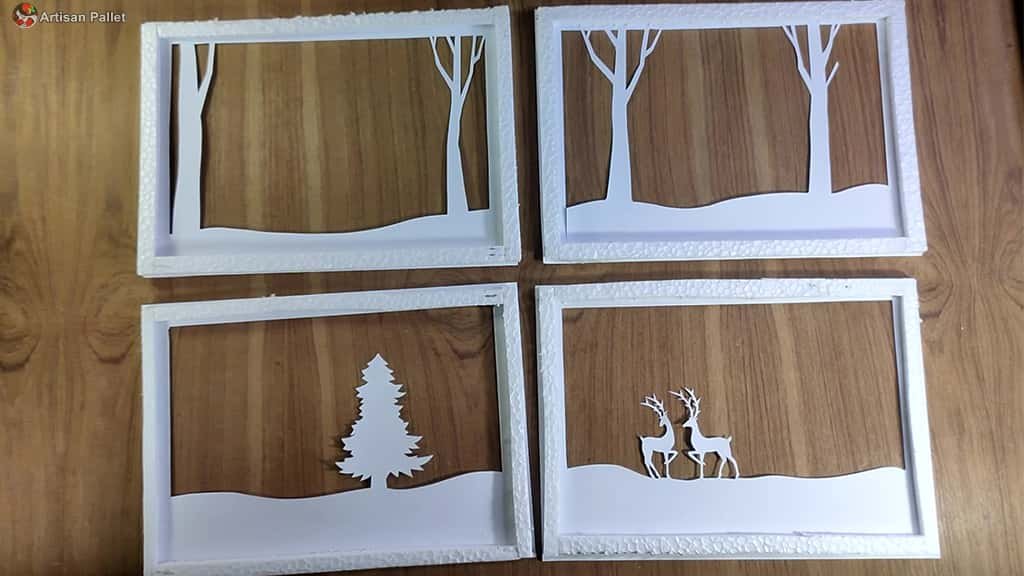
Step 5: Reposition the Layers

Foam spacers are placed between each layer as the layers are reassembled. Thus, an image appears three-dimensional and has a sense of depth.
If you add more layers to your Christmas lightbox, you will get a better result.
Step 6: Put Some LED Lights in the Box

I decided to put a LED light string coiled it up and place it on a thermocol base. As it’s shown in the pictures.
Different types of light can be used like fairy lights, or LED lights, depending on your preference. You can also use RGB LED lights for a better color effect. They are also very energy efficient. So, these are perfect materials for this type of Christmas Shadowbox.
Finally, Turn Your Light Box on and Get Ready for Exciting Results!

Thank you so much and Please accept my sincere thanks for watching.. I hope you will enjoy this wonderful Christmas DIY Lightbox.
If you have any suggestions or feedback then please let me know in the comment section it motives me a lot…

